From Experiments to Endpoints: The Flask Way of ML Deployment
This article explains how Flask helps bridge the gap between machine learning models and real-world applications by exposing models as REST APIs. It covers the complete implementation workflow also.
Introduction – Why deployment matters in ML
Why Flask for ML Deployment?
The Deployment Workflow
Example: Deploying an Iris Classifier
Training and saving the model
Building a Flask API
Testing the API
Conclusion
1) Introduction
Imagine you’ve just trained a machine learning model that can predict whether a customer will churn, or classify a plant species from a picture. You’re excited because the model performs well in your Jupyter notebook. But then comes the big question: how do you let the outside world use it?
That’s where deployment enters the picture. Deployment is about taking your model out of the “research lab” and putting it into the “real world” where applications, websites, or mobile apps can request predictions.
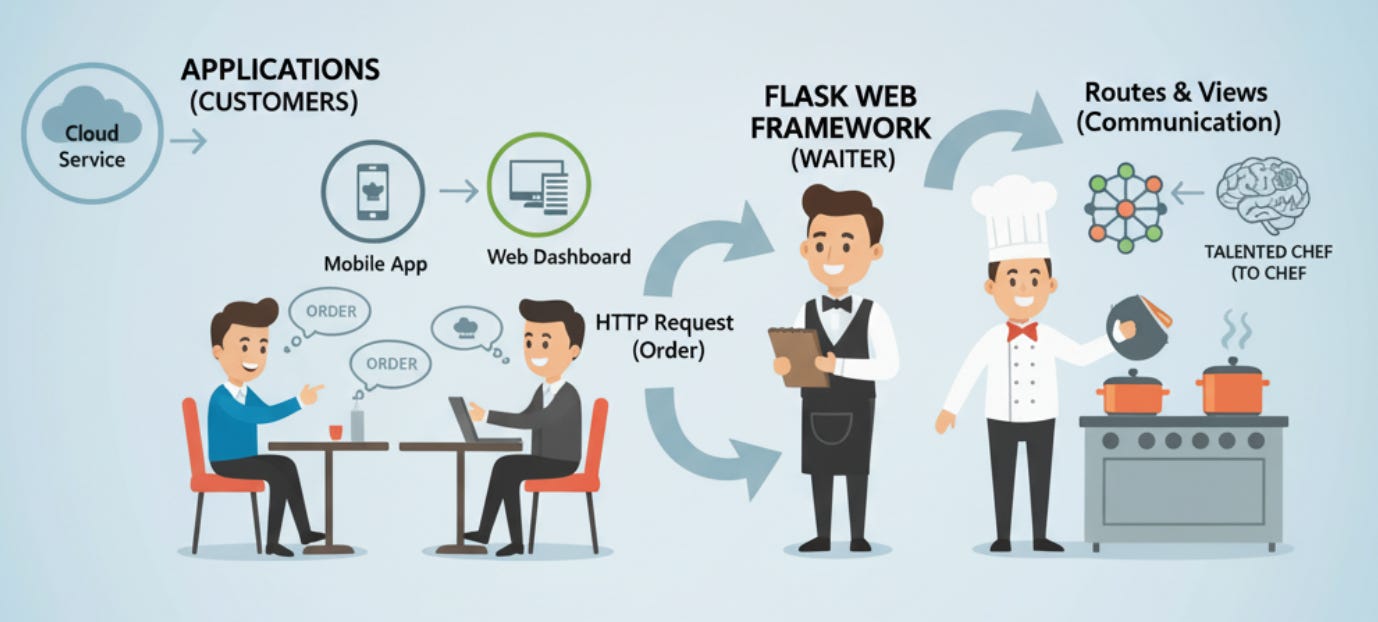
Enter Flask, a lightweight web framework for Python. Flask acts like a “bridge” between your machine learning model and the applications that need it. Think of your model as a talented chef in the kitchen. Flask is the waiter that takes orders from customers (apps), communicates them to the chef (model), and delivers the dishes (predictions) back to the table.
In this article, we’ll go through how Flask helps in deploying ML models, the technical details, and some best practices you can apply to make your deployments production-ready.

2) Why Flask for ML Deployment?
Flask is one of the simplest Python frameworks you’ll ever work with, and that’s exactly what makes it powerful for ML. Unlike heavier frameworks (like Django), Flask is minimalistic. It gives you just enough tools to expose your model as an API and nothing more unless you ask for it.
Some advantages of using Flask for ML deployment:
Python-native: Most ML models are trained in Python (scikit-learn, PyTorch, TensorFlow). Flask is Python too no language hopping required.
REST API Ready: Flask makes it easy to create REST endpoints (e.g.,
/predict), which is the standard way for apps to communicate with ML models.Lightweight & Flexible: No rigid project structure. You decide how your app should look.
Easy to Scale (with help): While Flask itself is single-threaded, it works beautifully with production servers like Gunicorn and containers like Docker.
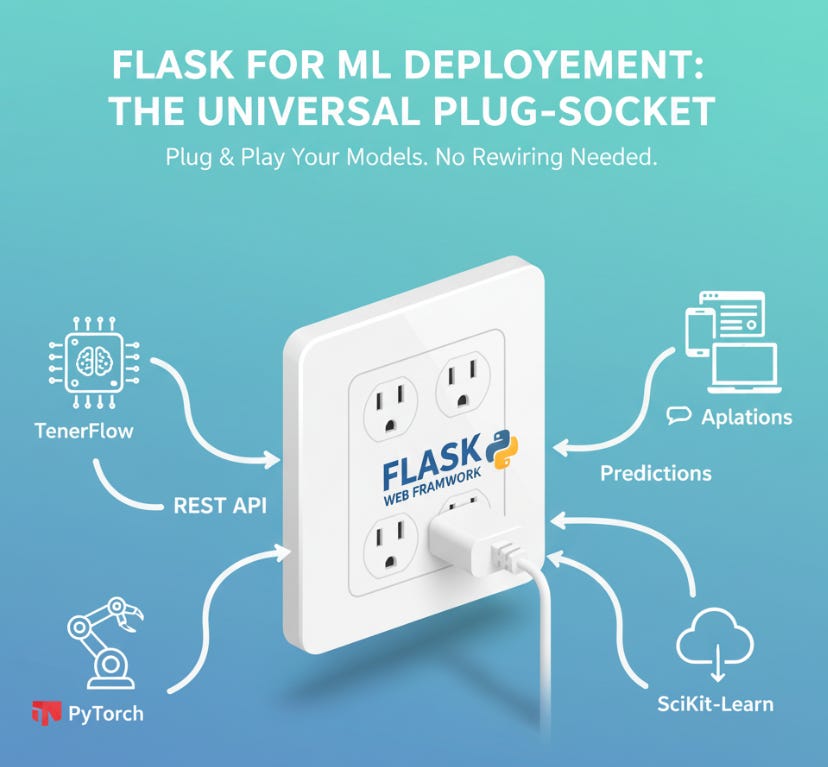
Think of Flask as a plug socket you can plug in different devices (models) without changing the wiring.

3) The Deployment Workflow
When you deploy an ML model with Flask, the pipeline typically looks like this:
User Request (Mobile/Web App)
            ↓
    Flask API Endpoint (/predict)
            ↓
  Load ML Model (Pickle/Torch/ONNX)
            ↓
       Run Inference
            ↓
   Send Prediction as Response
Let’s make it more concrete with an example.
4) Example: Deploying an Iris Classifier
Suppose you’ve trained a logistic regression model on the Iris dataset (a classic ML dataset for classifying flower species). Here’s how you would put it behind a Flask API.
Step 1: Train and Save the Model
# train_model.py
import joblib
from sklearn.datasets import load_iris
from sklearn.linear_model import LogisticRegression

X, y = load_iris(return_X_y=True)
model = LogisticRegression(max_iter=200)
model.fit(X, y)

joblib.dump(model, "iris_model.pkl")
Step 2: Flask API
# app.py
from flask import Flask, request, jsonify
import joblib
import numpy as np

app = Flask(__name__)
model = joblib.load("iris_model.pkl")

@app.route("/predict", methods=["POST"])
def predict():
    data = request.get_json(force=True)
    features = np.array(data["features"]).reshape(1, -1)
    prediction = model.predict(features)
    return jsonify({"prediction": int(prediction[0])})

@app.route("/health", methods=["GET"])
def health_check():
    return jsonify({"status": "API is running!"})

if __name__ == "__main__":
    app.run(debug=True, host="0.0.0.0", port=5000)
The process begins by importing three essential Python libraries: Flask, joblib, and NumPy. Flask serves as the web framework that enables the creation of HTTP endpoints for communication between clients and the model. Joblib, on the other hand, is used for loading pre-trained models that have been serialized and stored, while NumPy handles numerical data manipulation and reshaping, which are necessary before feeding input into the model.
After setting up the environment, the Flask application is initialized using Flask(__name__). This call creates an app instance that defines the entry point for all API routes. Immediately after initialization, the pre-trained model is loaded into memory with joblib.load(”iris_model.pkl”). This ensures that the model is available globally and does not need to be reloaded with every prediction request, making the API efficient and responsive.
The heart of this application lies in the /predict endpoint. When a user sends a POST request to this route, the server expects to receive a JSON object containing numerical features that the model can process. These features are extracted from the incoming data, converted into a NumPy array, and reshaped to ensure compatibility with the model’s input format. The model then generates a prediction, which is converted to an integer (as classification outputs are often encoded numerically) and returned as a JSON response. This structure enables seamless communication between front-end systems and the backend ML model — a critical element in real-world ML applications.
Another important route, /health, serves as a health check endpoint. Its purpose is simple yet vital: it allows developers or monitoring tools to verify that the API is active and operational. When accessed, it returns a short JSON message confirming that the system is running correctly. This is especially useful in production environments, where automated monitoring systems routinely check service availability.
Finally, the application is launched through the main execution block. Flask runs the app on host 0.0.0.0 (making it accessible from external networks) and port 5000, with debugging enabled to support live development and troubleshooting. Once active, users can send HTTP POST requests to the /predict endpoint with properly formatted JSON data — for example, a list of numerical features from the Iris dataset. The API will process the input and return the model’s classification output in real time.
Step 3: Testing the API
Use CURL or Postman:
curl -X POST http://127.0.0.1:5000/predict \
     -H "Content-Type: application/json" \
     -d '{"features": [5.1, 3.5, 1.4, 0.2]}'
Output:
{"prediction": 0}5) Conclusion
Flask plays the role of the messenger between your ML model and the outside world. It doesn’t try to be everything — instead, it gives you just enough to expose your model as an API. For small to mid-sized projects, Flask is more than enough to move your ML models from “Jupyter notebooks” to production applications.
If you’re just stepping into ML deployment, mastering Flask is like learning how to ride a bike before driving a car it gives you confidence, clarity, and the foundation you’ll need as you scale to more advanced tools.
We will try to understand flask in detailed manner in the next article as well. We recommend you to watch video on flask to learn practical demonstration.


Why not fastapi ? There is async benefit aswell